Labs
Introduction
This page allows you to view completed and ongoing labs.
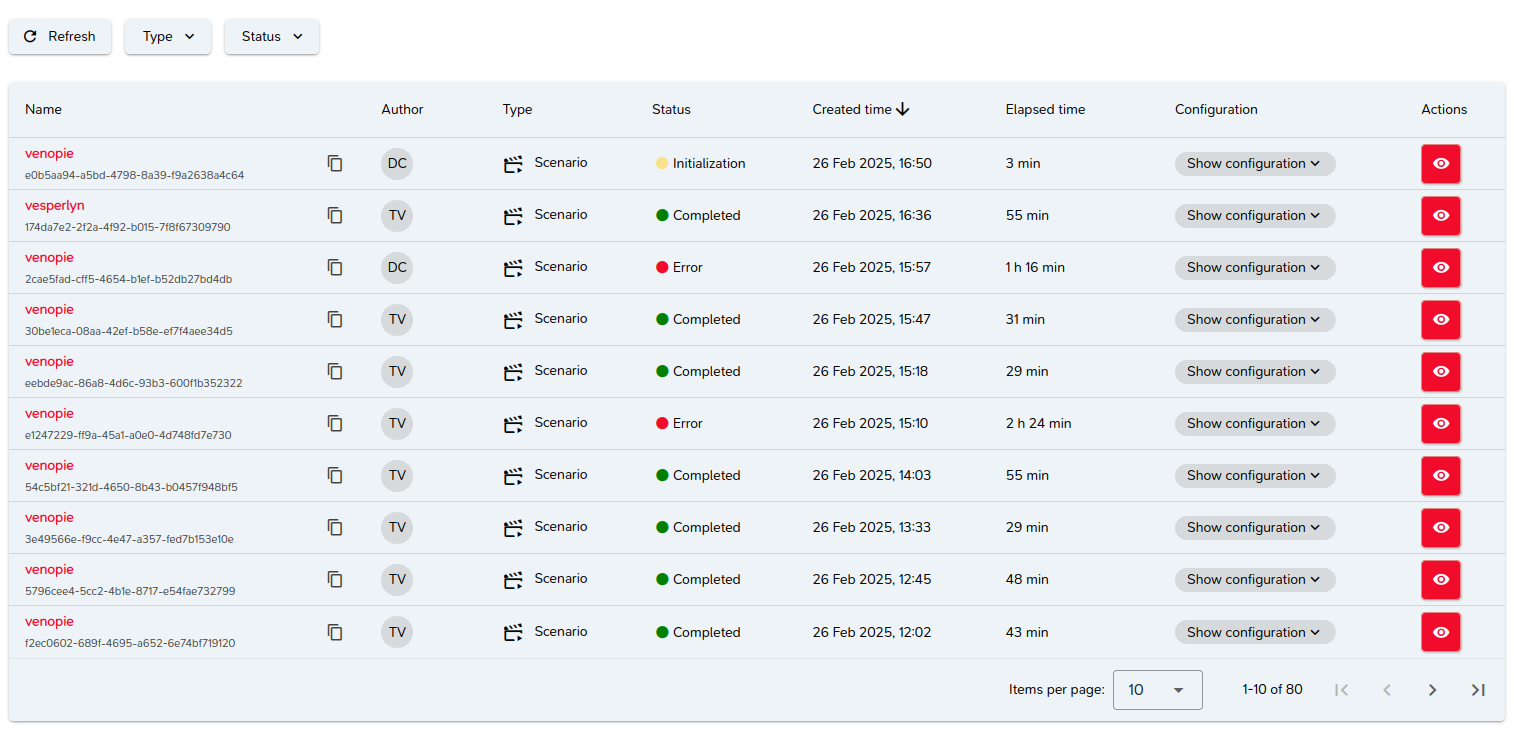
Labs are presented in a paginated list, sorted from most recent to oldest.
Definition of a Lab
A lab represents an experiment that corresponds to:
- The execution of an attack, or
- The execution of a scenario, or
- The instantiation of a topology, or
- The instantiation of a basebox (virtual machine).
Experiments 3 and 4 are only possible using the M&NTIS CLI.
Lab Information
General Information
Each item in the list corresponds to a lab and presents the following information:
- The name of the element associated with the lab and its ID,
- The user who performed the lab,
- The type of lab,
- Its status,
- Its creation date,
- Its duration.
You can access the lab configuration settings by clicking the "Show configuration" button.
Configuration Parameters
The parameters are as follows:
- Maximum execution duration,
- Execution mode,
- Whether dataset generation is enabled,
- Selected integrations,
- The name of the associated topology,
- Whether legitimate background activity generation is enabled.
Configuring a Lab
Before execution, a lab's configuration can be modified.
It consists of several steps, all optional.
Step 1: Topology
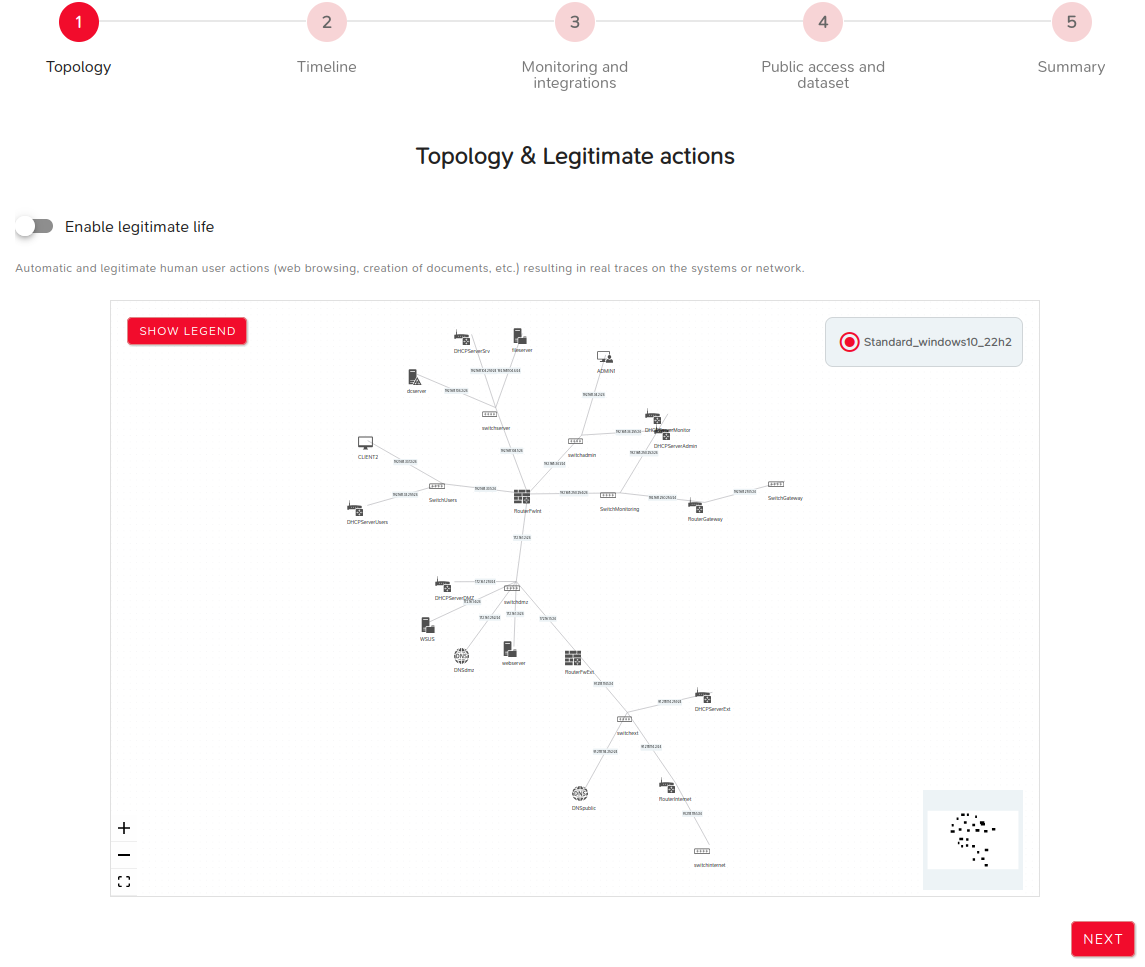
This step involves selecting the topology to be used.
It also allows enabling the generation of legitimate background activity during lab execution.
The NEXT button proceeds to the next step.
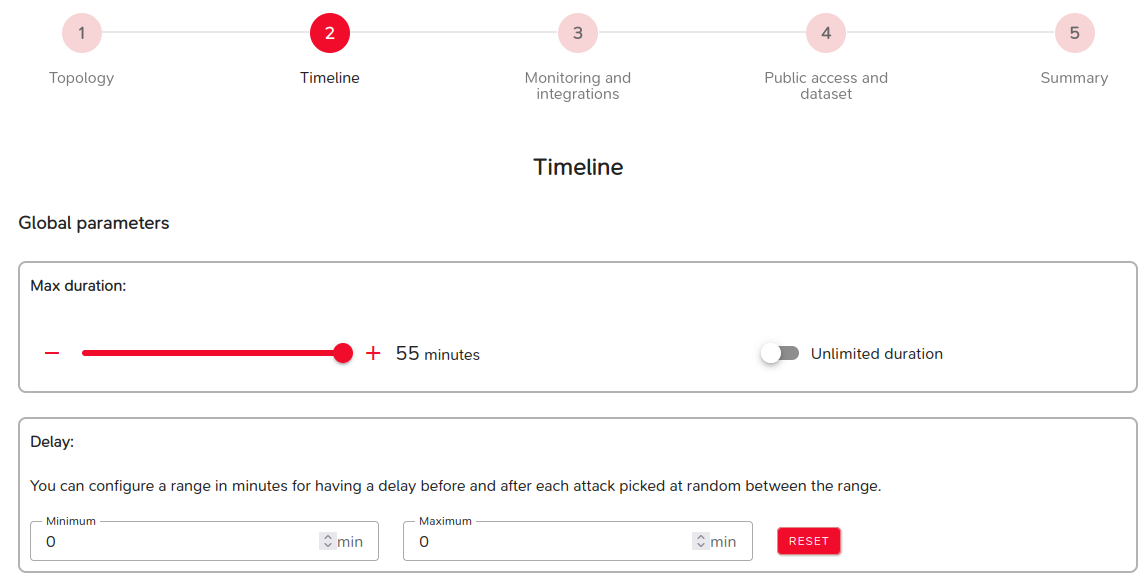
Step 2: Timeline
Several parameters can be modified during this step:
- Parameters affecting lab duration:
- Maximum execution duration: the lab will stop beyond this duration,
- Delay between attacks (min and max),
- Parameters defining the lab execution mode:
- Automatic: the lab runs from start to finish without stopping,
- Step-by-step: the lab pauses between attacks, requiring manual intervention to continue execution,
- Custom: you choose after which attack the lab should pause.
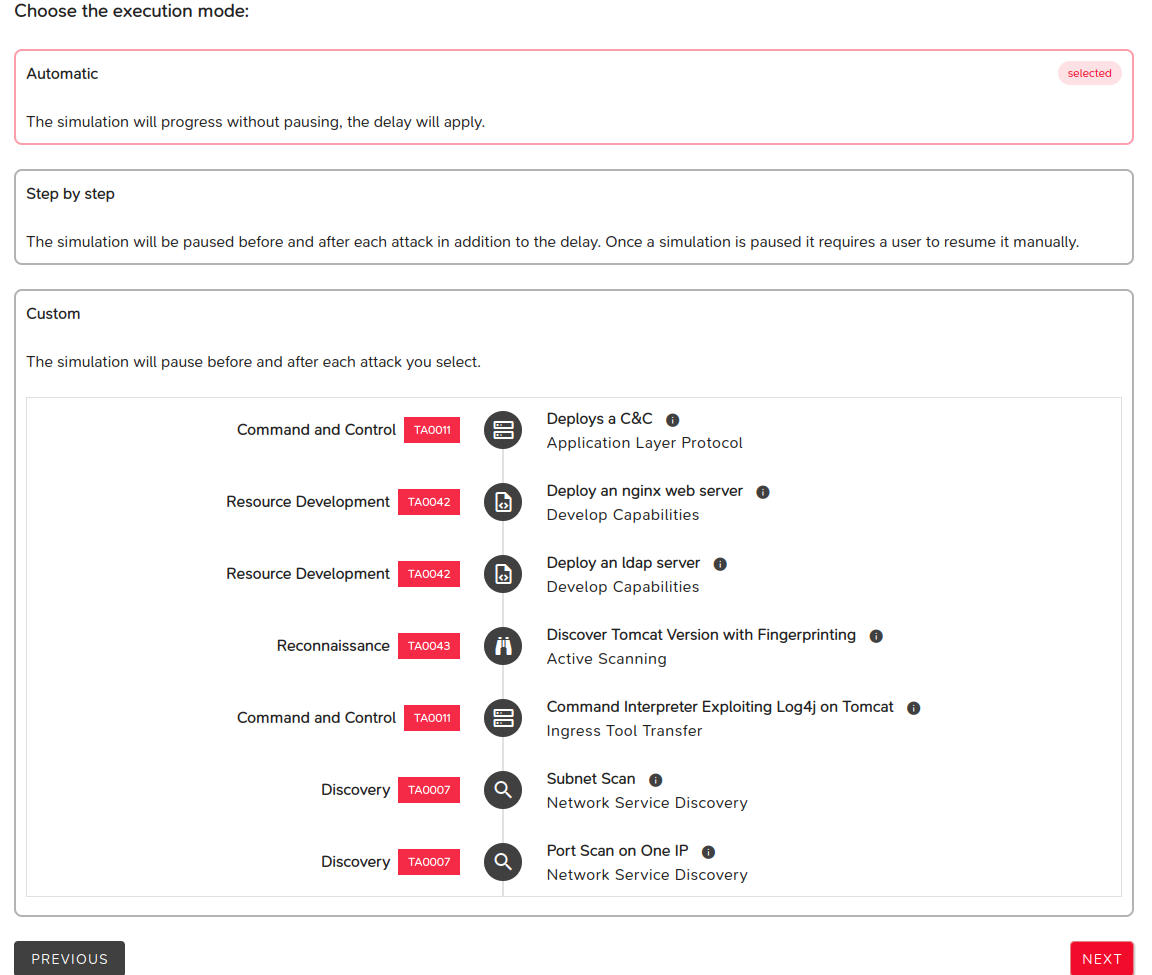
The NEXT button proceeds to the next step.
The PREVIOUS button returns to the previous step.
Step 3: Monitoring and Integrations
The following parameters modify the existing topology.
This involves selecting components to be deployed within the topology, depending on their type.
These components belong to the following families:
- Collection agents,
- Network probes,
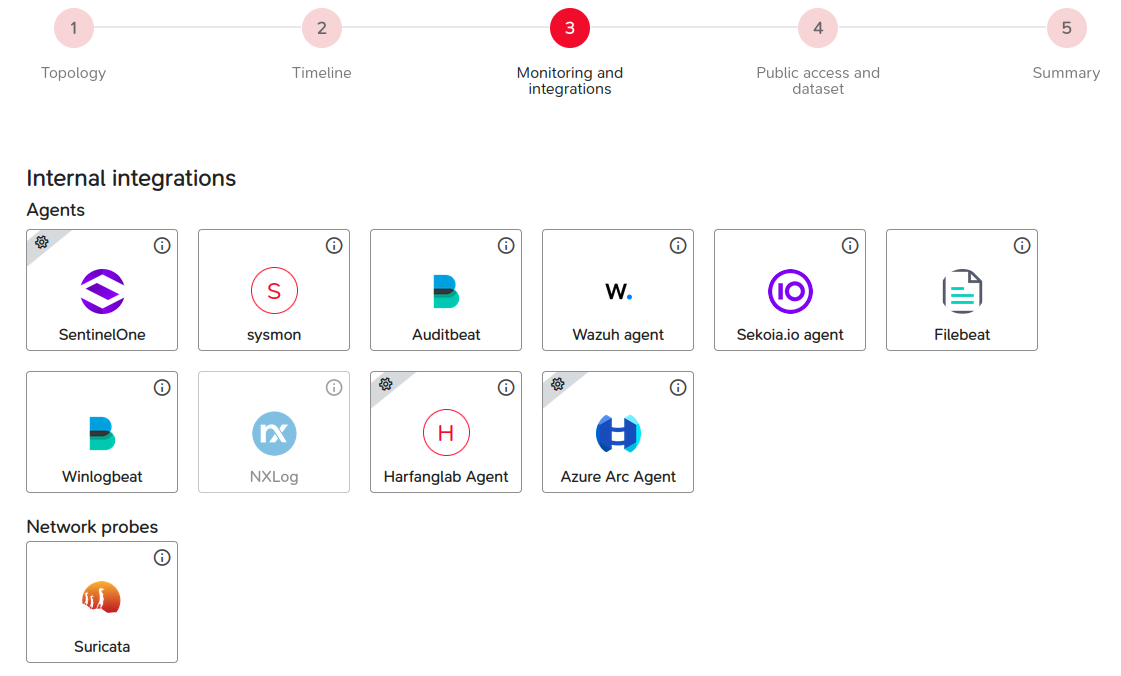
Additionally:
- Log visualizers,
- External SIEMs.
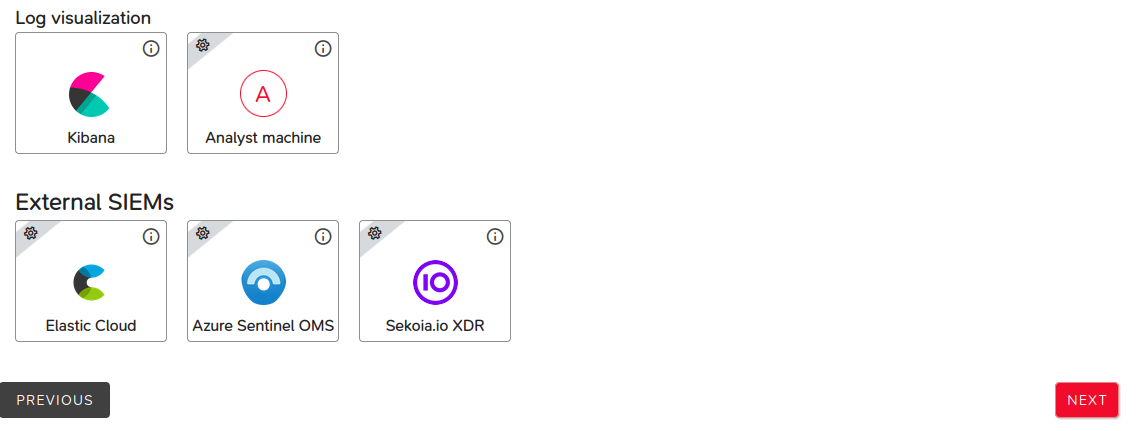
Some integrations require specific input parameters. Consult this section to find out which parameters are required for a given component.
The NEXT button proceeds to the next step.
The PREVIOUS button returns to the previous step.
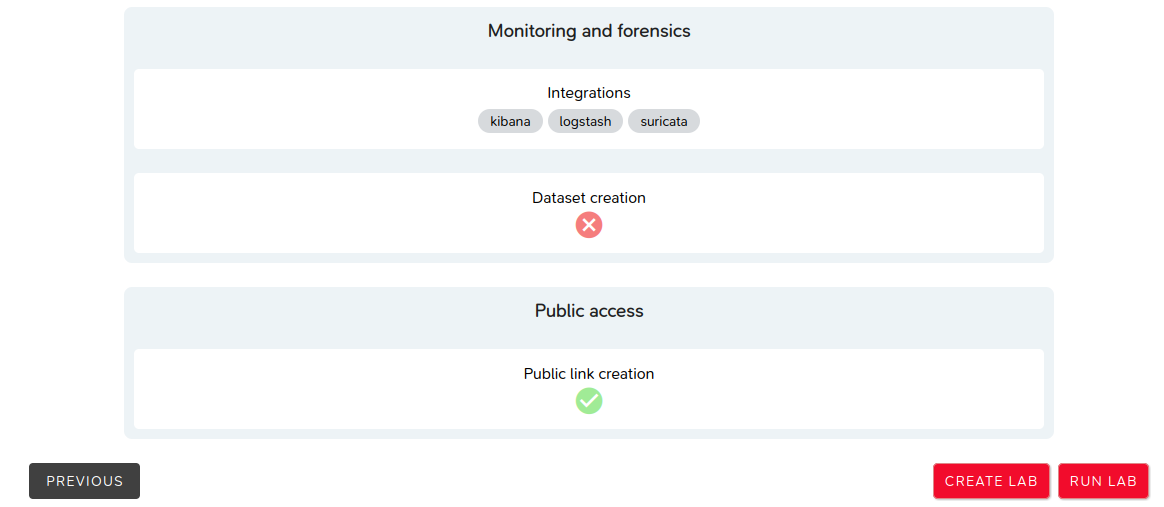
Step 4: Public Access and Dataset
This step allows granting or denying public access (i.e., no authentication required) to the ongoing lab.
It also specifies the selected post-processing tasks:
- Dataset generation,
- Network capture,
- Forensic artifact creation.
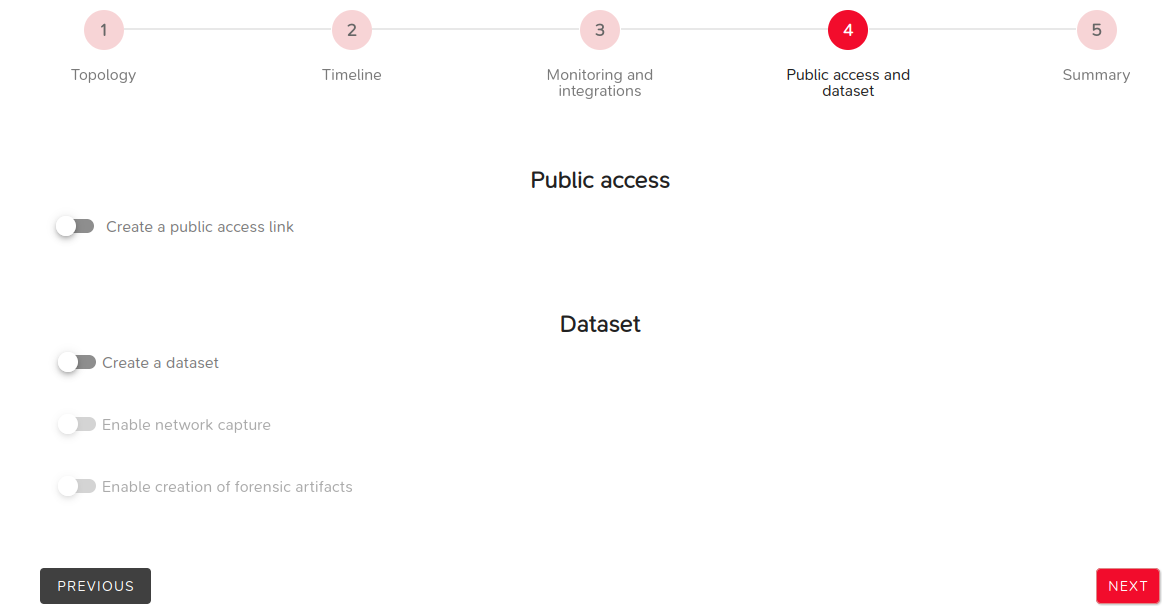
The NEXT button proceeds to the next step.
The PREVIOUS button returns to the previous step.
Step 5: Summary
This final step summarizes the selected parameters from the previous steps.
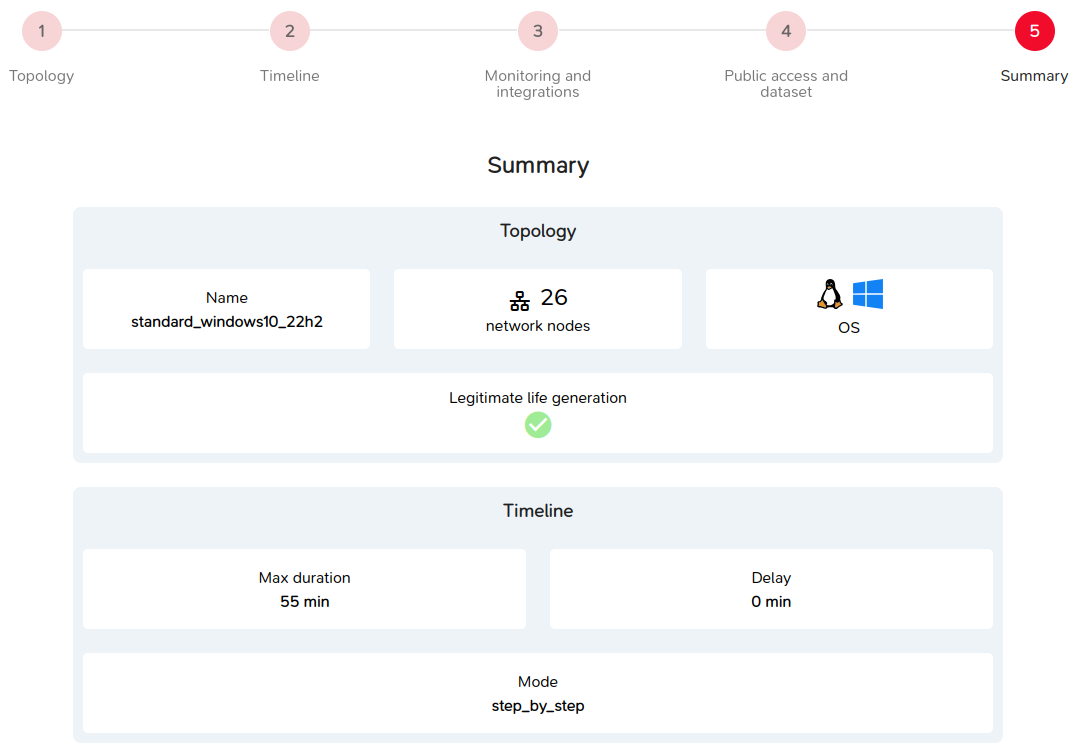
The NEXT button proceeds to the next step.
The PREVIOUS button returns to the previous step.
The CREATE LAB button creates the lab without starting it.
The RUN LAB button creates and starts the lab.
Running a Lab
During the execution of a lab, several pieces of information are accessible, presented in tab format.
General Information
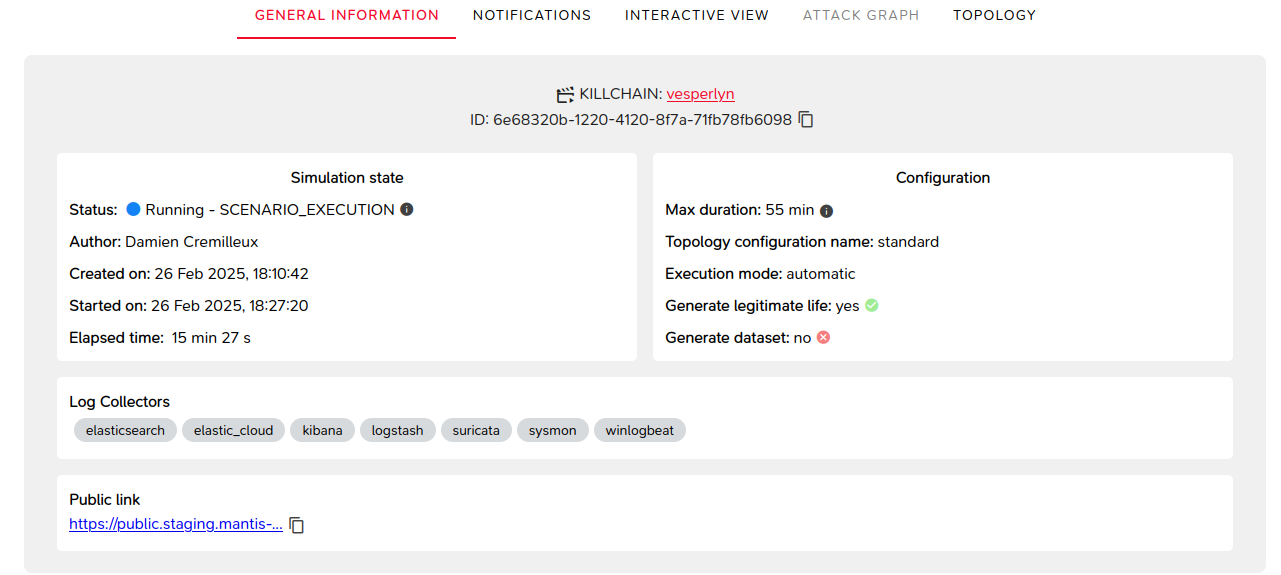
This includes details related to the creation and configuration of the lab.
Notifications
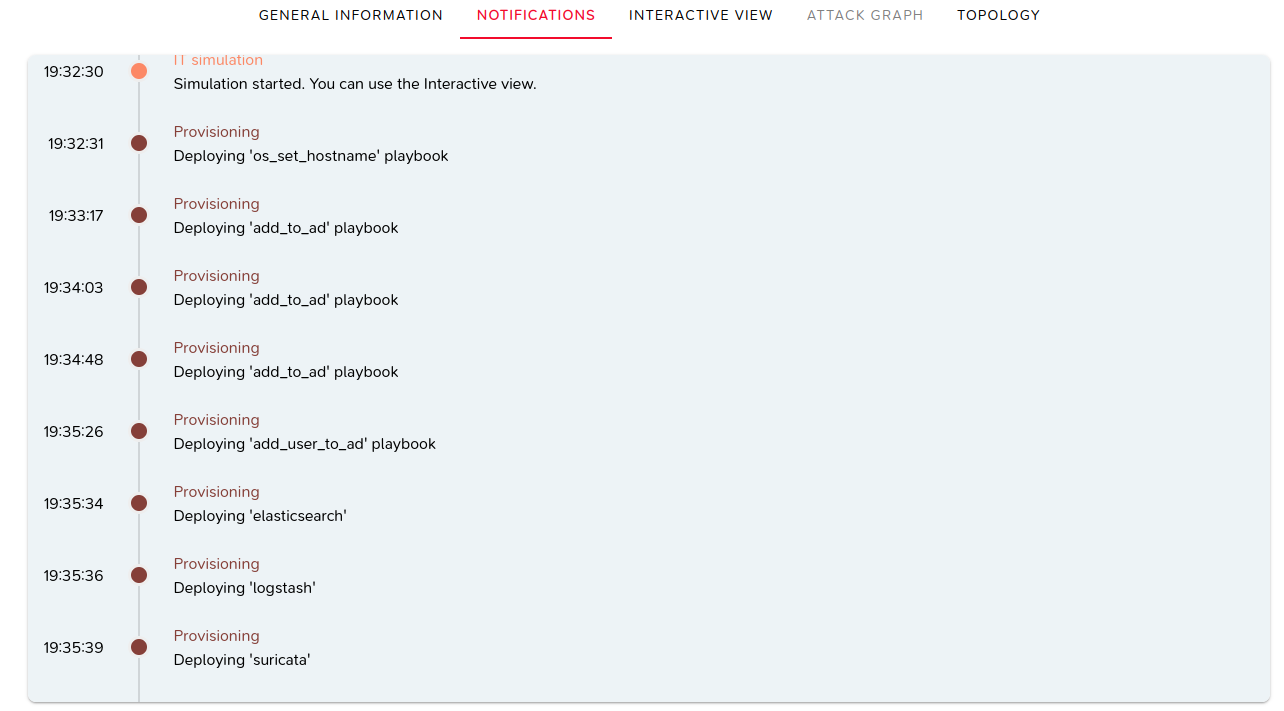
Notifications are displayed as the lab progresses.
An automatic scroll ensures that the most recent notifications are always visible.
Interactive View
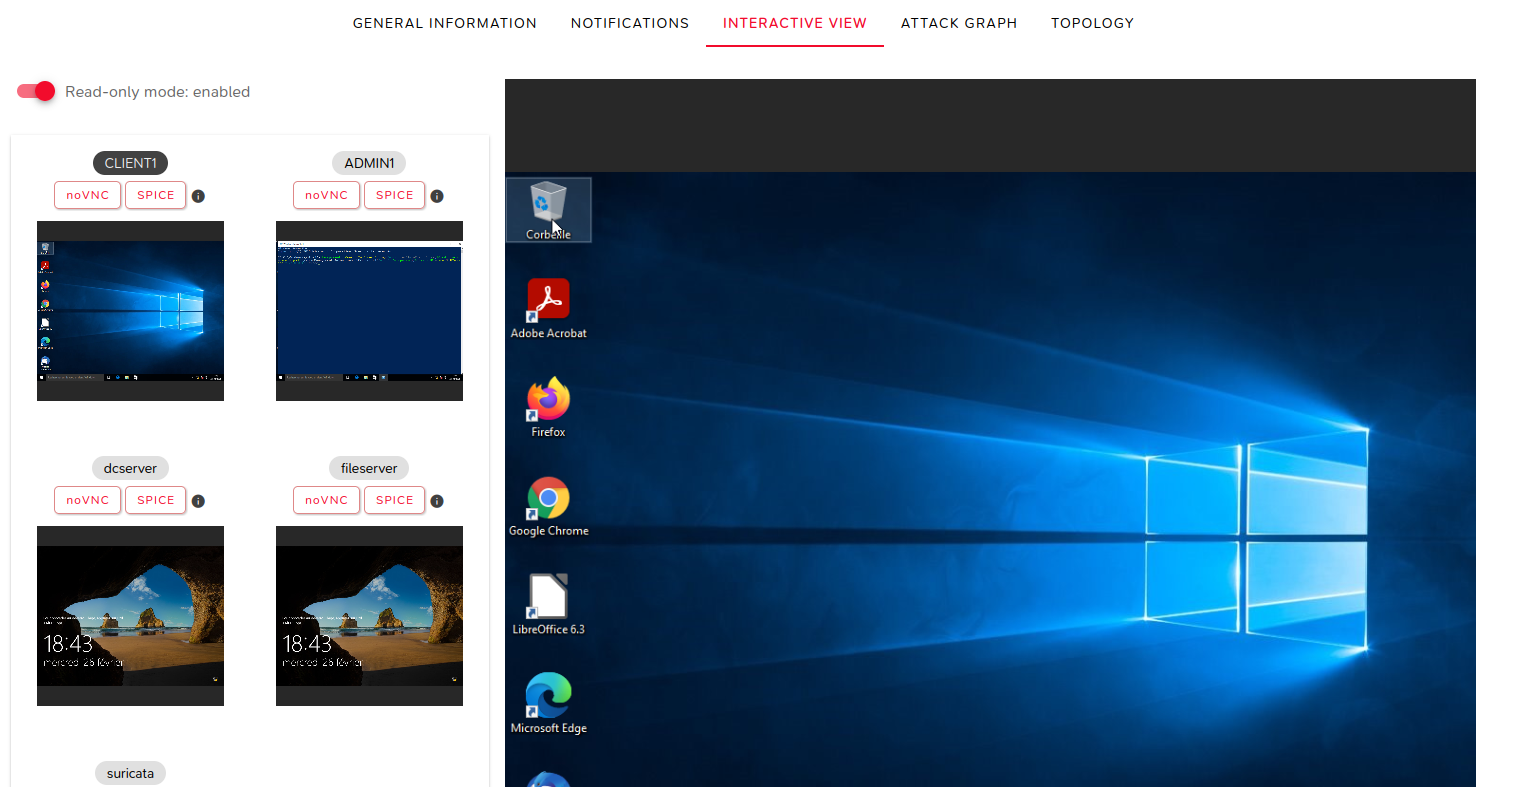
This view provides access to the various virtual machines in the topology.
Access is either read-only or full control, allowing connection to a specific machine via VNC or SPICE protocols.
Attack Graph
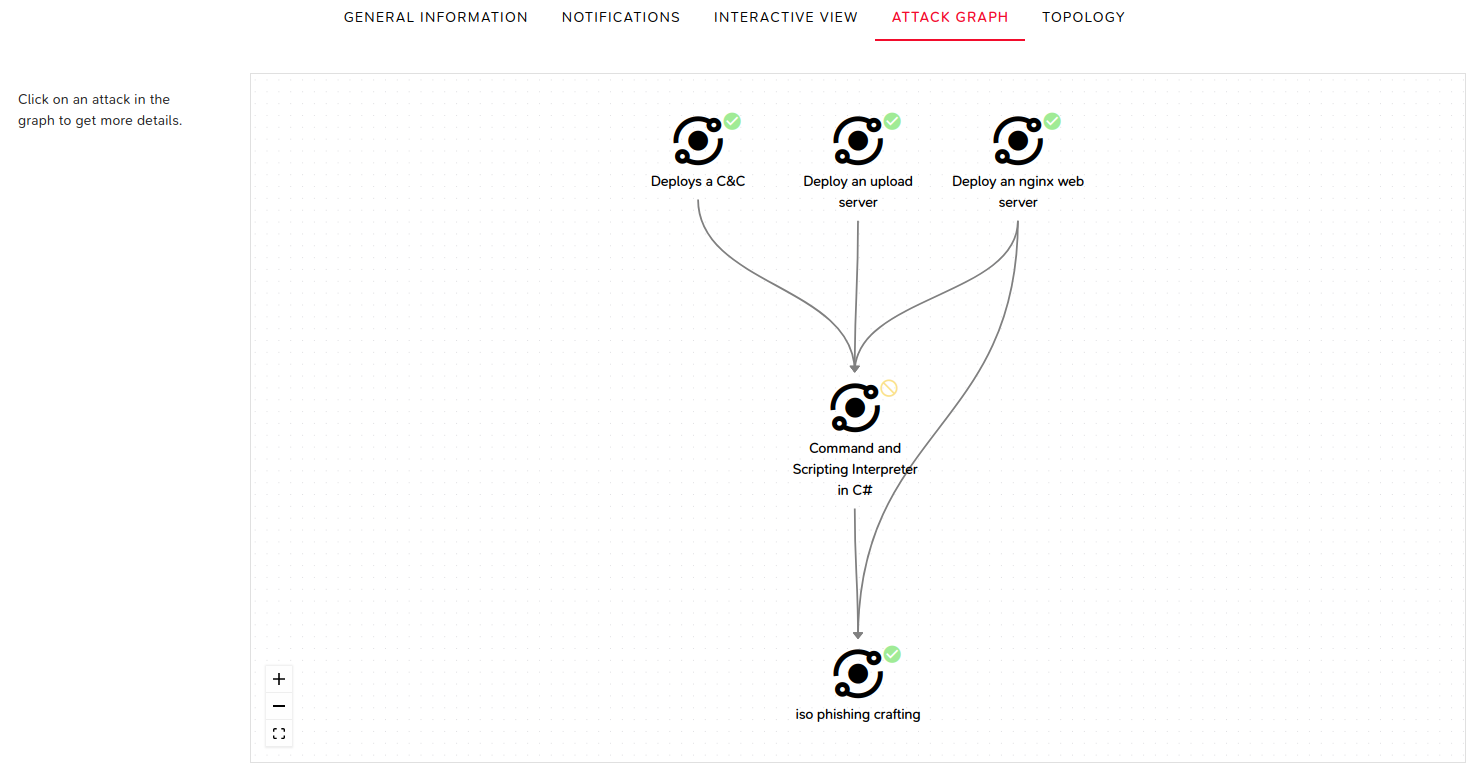
This view displays dependencies between executed attacks and provides details on specific attacks.
Topology
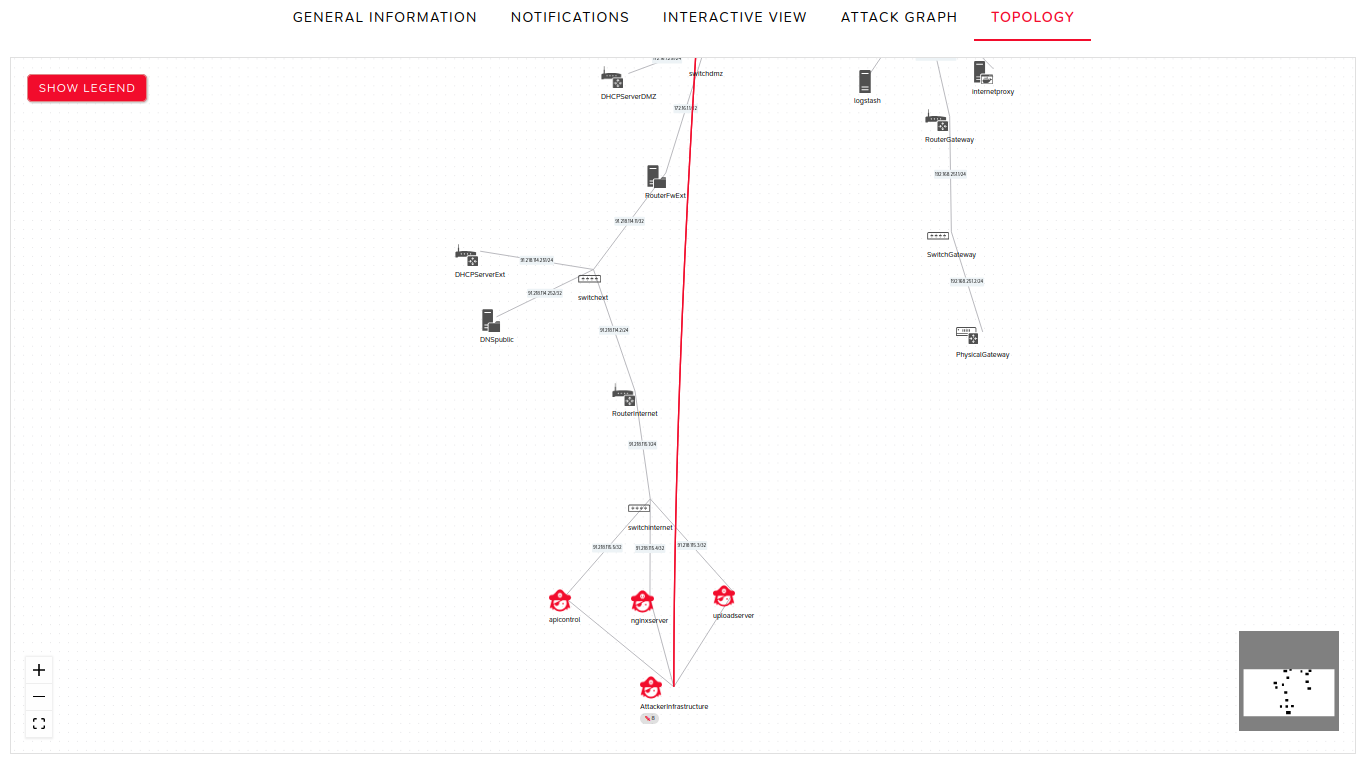
This view shows the impact of attacks on the nodes within the topology.